Schedule Emails From CSV Import
Import a CSV and schedule testimonial request emails with Testimonial Email Assistant.
Import a CSV of contacts and schedule testimonial request emails with Testimonial Email Assistant (T.E.A.). Use this when you already have the email list and do not want to BCC T.E.A. on each message.
Note: T.E.A. is available on Ultimate and Ultimate+.
Open T.E.A.
In the Space dashboard, click Automation in the left sidebar, then open Testimonial Email Assistant.
Finish Setup first if the page opens there (snippet or email tool not configured yet).
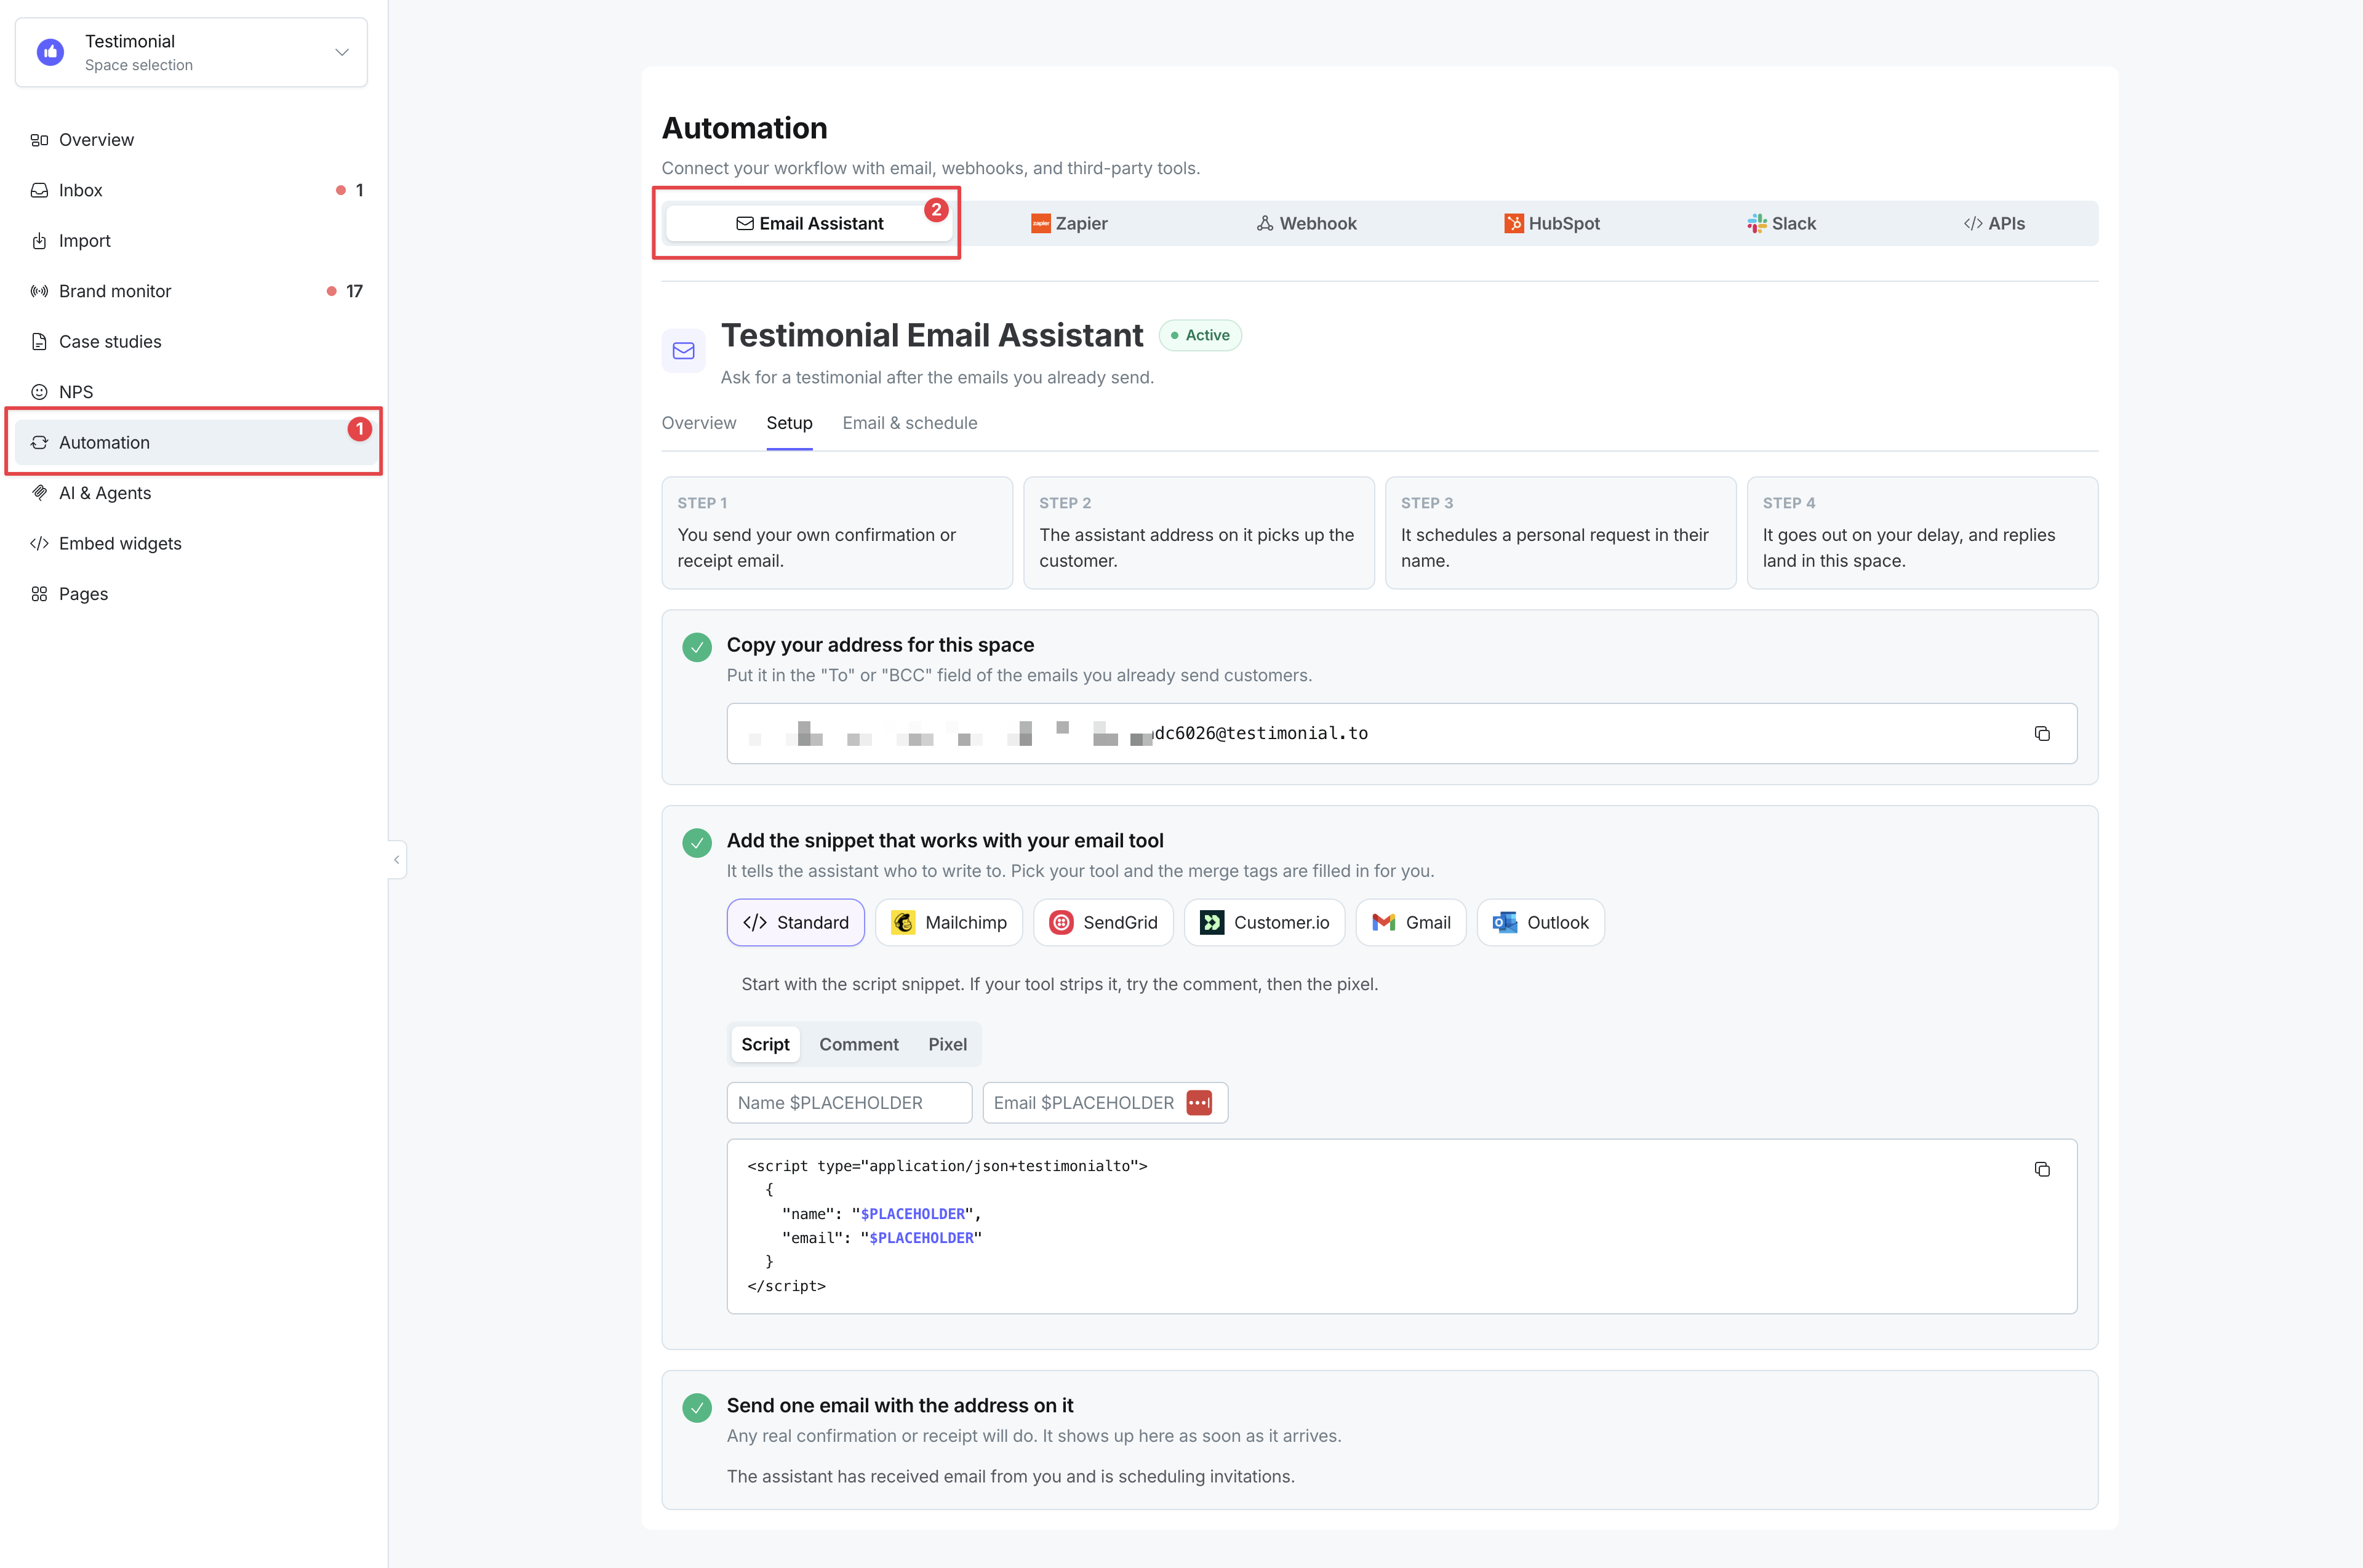
Set the follow-up email
On Setup or Email & schedule, under Sent Delay, choose immediate, 1 day, 3 days, or 7 days. Edit the email details.
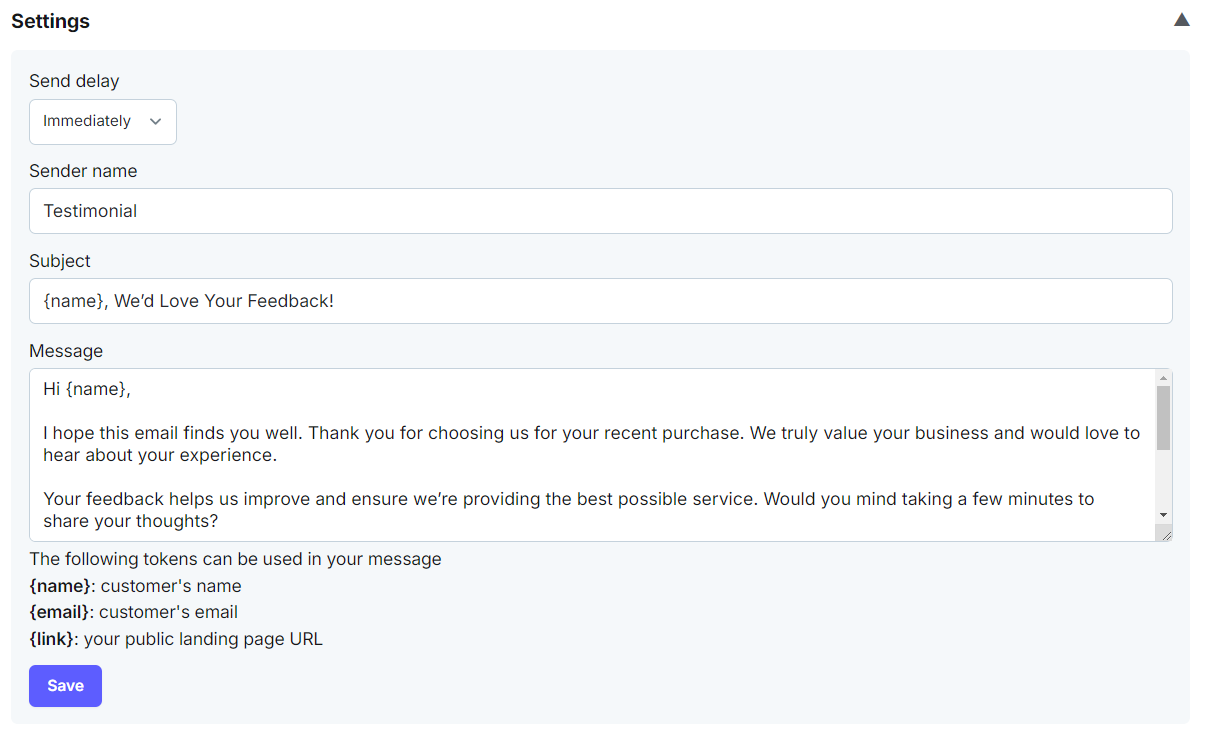
Save the changes.
Import the CSV
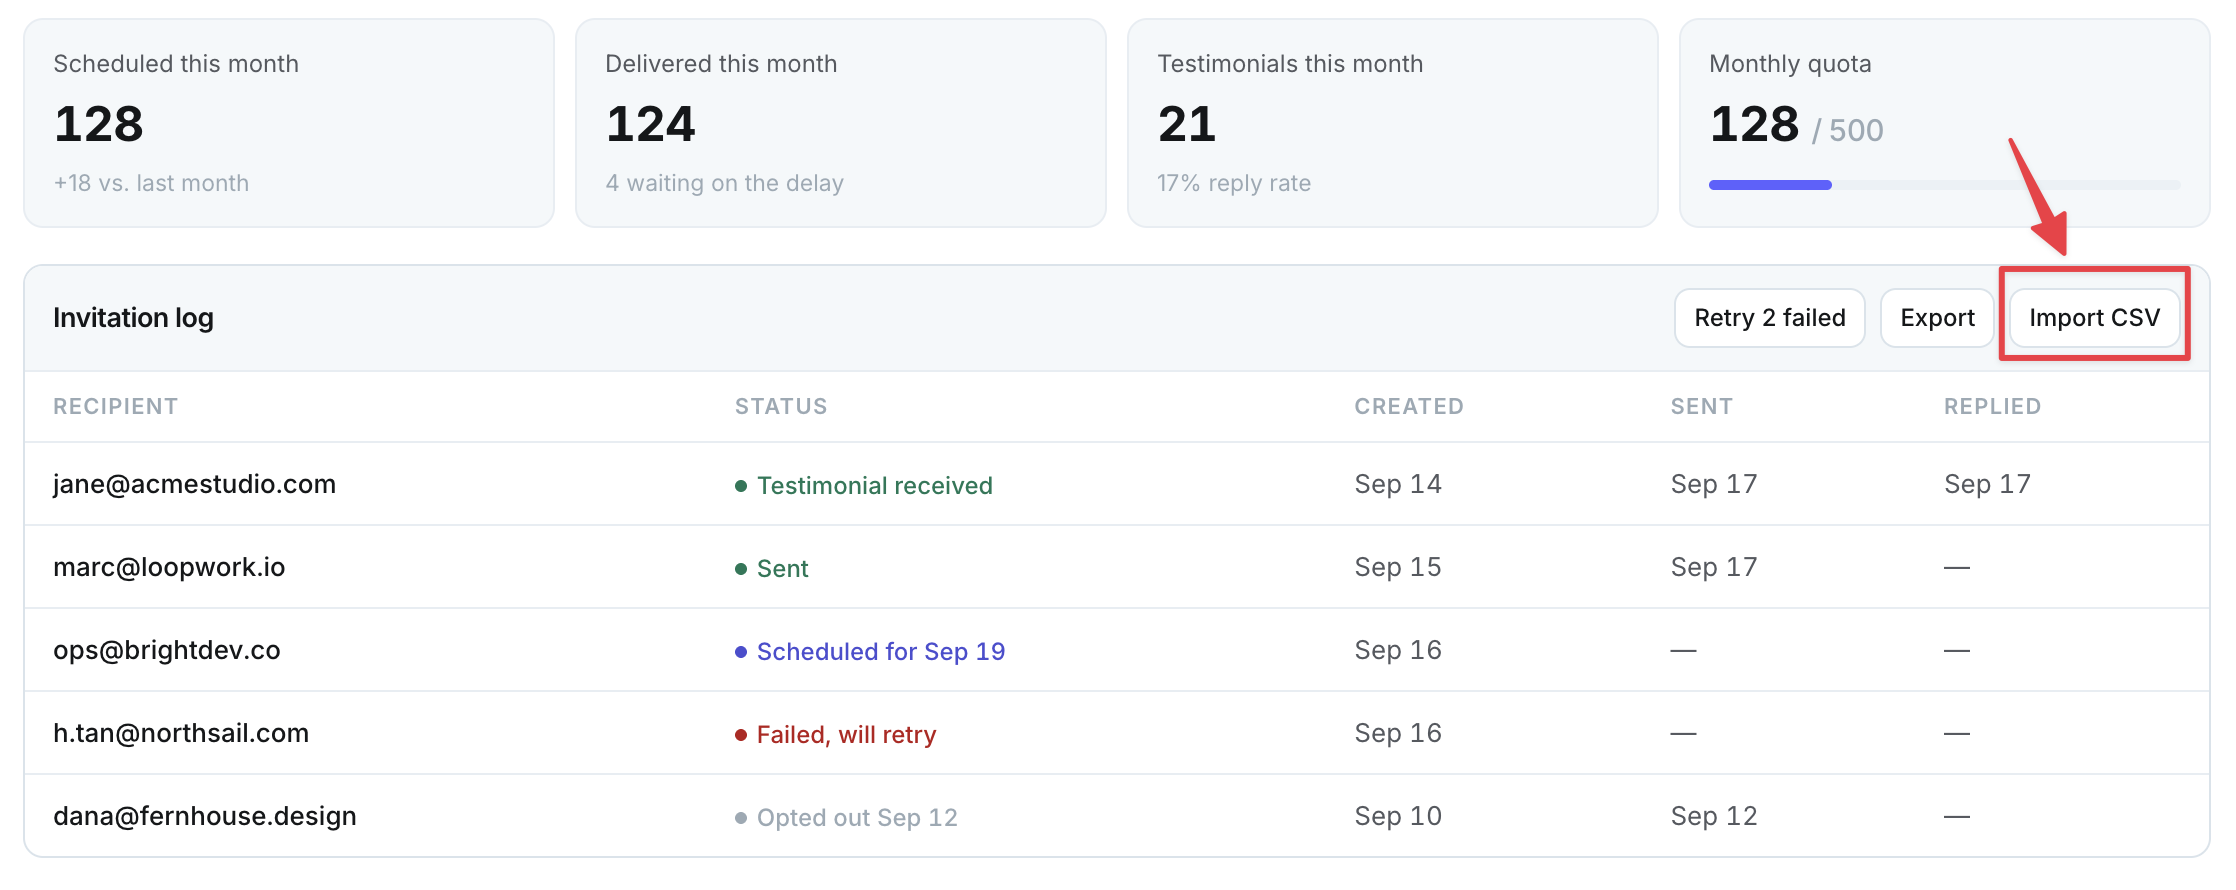
On Overview, open the invitation log and click Import (Import and Export sit on the log, not in a separate accordion).
Match the format in the sample CSV, then select your file.
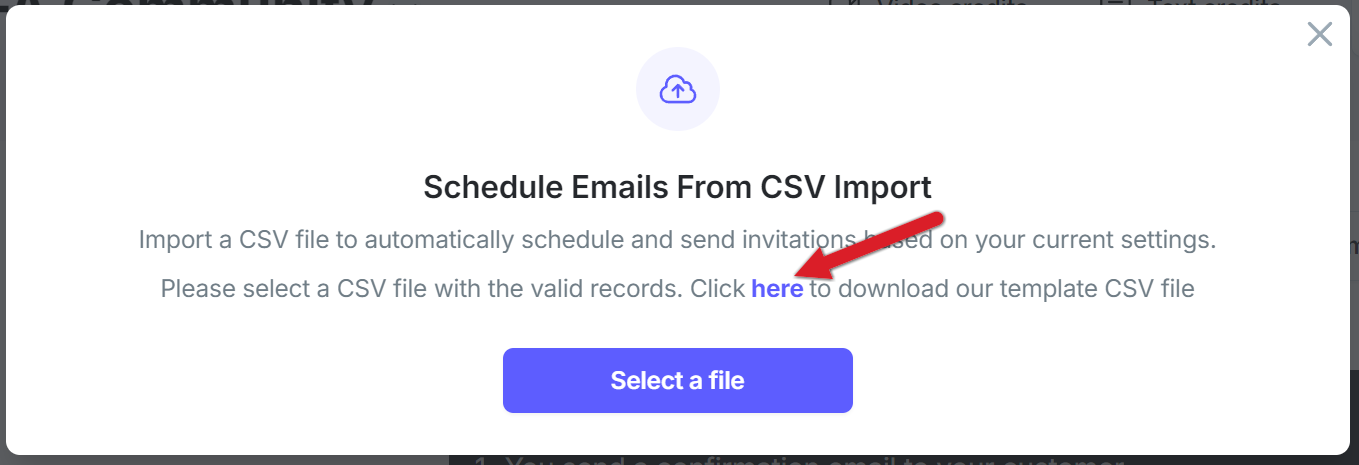
Upload the file and choose the sent delay. After upload, you will see the number of invitations and how many emails you have left.
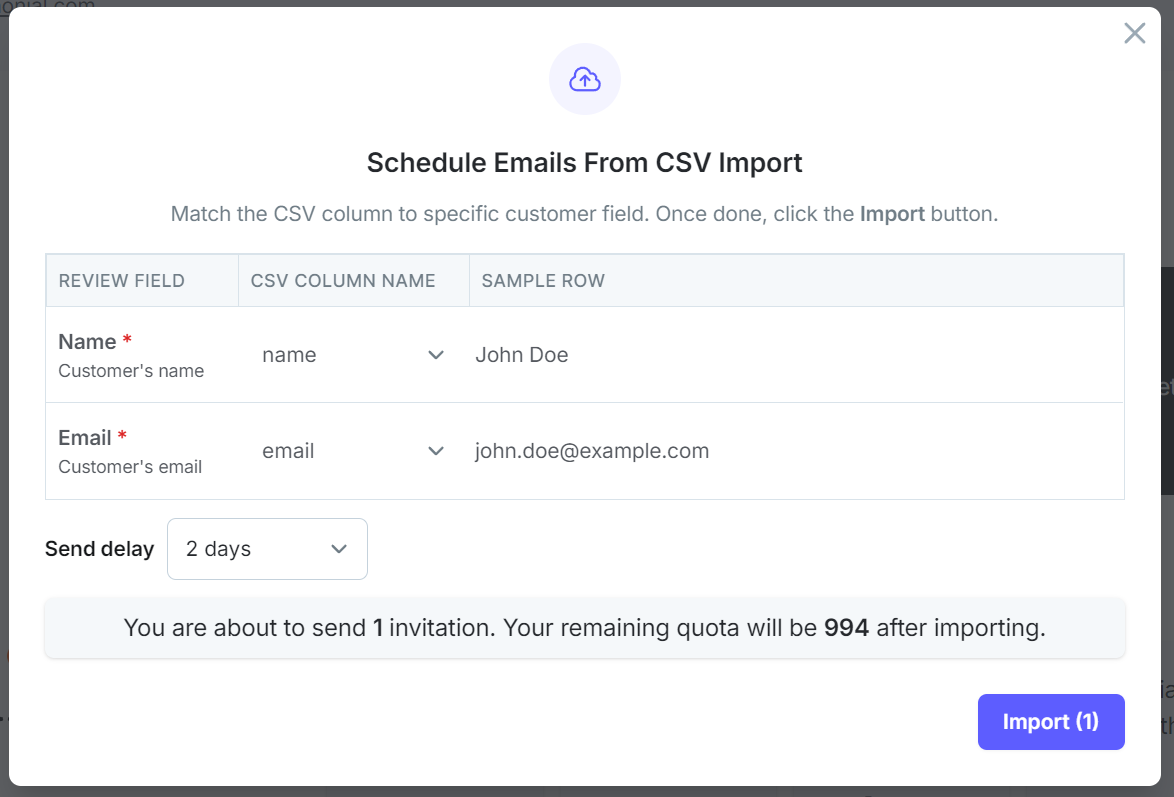
Click Import to schedule the emails.
On Overview, check Scheduled and Delivered. They are separate tiles: Scheduled reflects scheduled invitations and quota usage; Delivered reflects emails that were actually sent. When the monthly cap is hit, the quota tile can show warning styling and a caption.
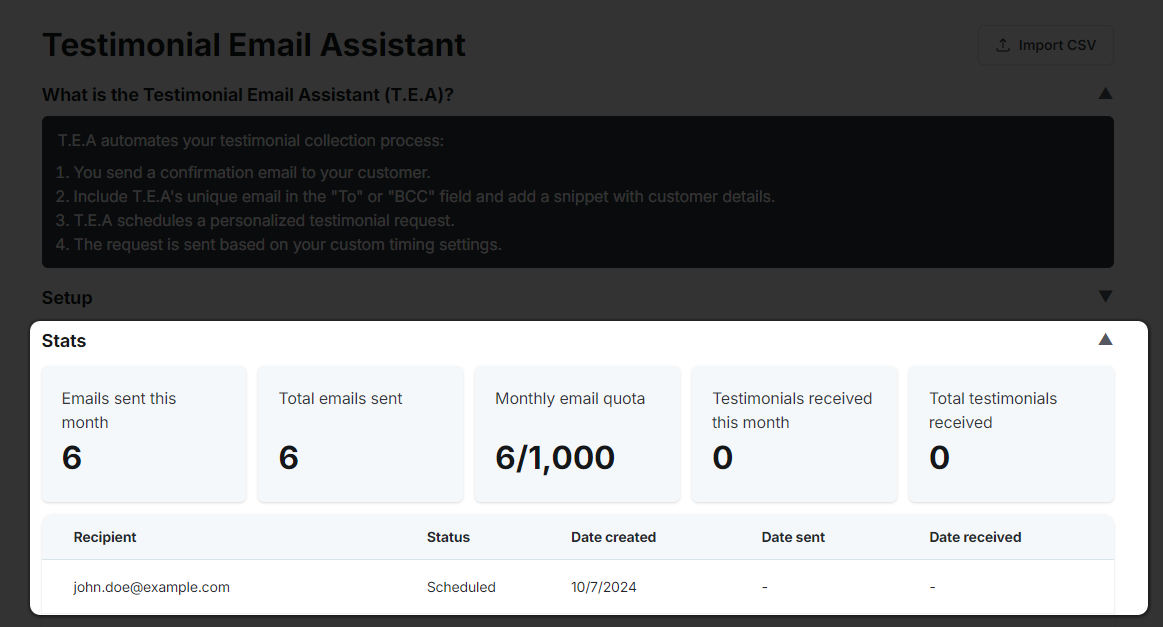
Note: Monthly email quota depends on your plan. See pricing. Quota counters reset at the start of each calendar month.
If invitations show as Failed, Expired, or Over quota, retry them one at a time or retry all for the space from the invitation log on Email & schedule. Retries use your remaining monthly quota. Older invitations past the retention window show as Expired and can be retried the same way.
Need help? Message us in the chat widget.